Recording your screen on a Chromebook is a powerful way to teach and observe student learning.
- Teachers can pre-record lessons, tutorials, feedback, and sub plans.
- Students can share a book report, explain how to do a math problem or show of the code of the app they are developing.
Screencasting is the process of capturing “screen video”, typically with voice narration. If a picture is worth 1,000 words, a screencast is worth 1,000,000!
Chromebooks are the dominant device in K-12 classrooms around the world so it’s worth taking a look at screencasting tools that are Chromebook compatible. If you need a screen recorder for Chromebook this guide will help you get started!
How to screen capture on a Chromebook
Regardless of what device you are using or which screencasting tool you choose, there are a few basics you should understand
Built-in ChromeOS Screen Recorder
You no longer need an extension to record your Chromebook screen! All Chromebooks come preinstalled with a GREAT, native screen capture and recording tool.
To take a quick screen shot or screencast, press Ctr + Alt + Switcher (the funky key above the number 6 on your keyboard).
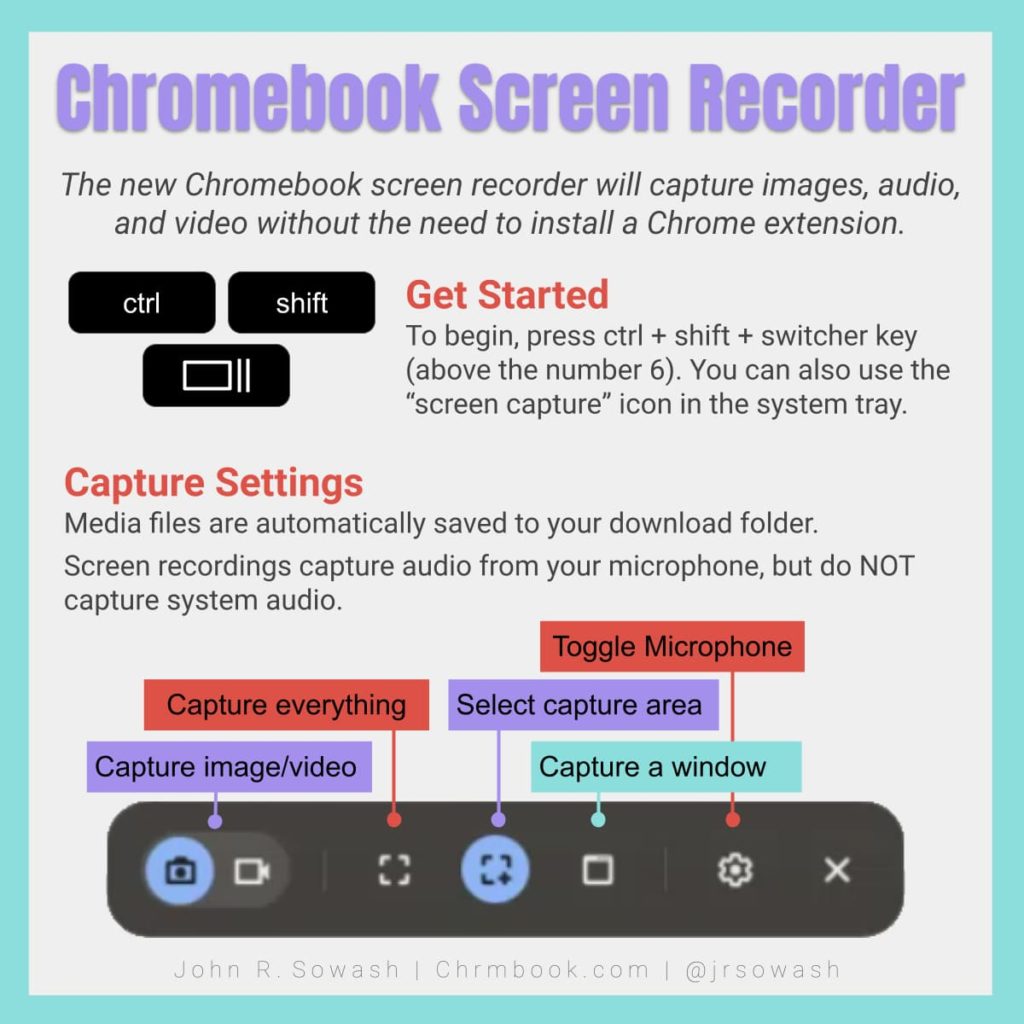
Tip: click the gear icon to configure your audio settings!
Video: Capture student learning with the Chromebook screen recording feature!
Advanced Screen recording options
The built-in screen recorder for Chromebooks is fine for short, simple recordings, but if you plan on teaching a lesson, or you want your students to record a more complex video, you should look at a more advanced solution.
The Best Screen Recorders for Chromebook
Good news! There are lots of free screen recorders for Chromebooks! The free tools listed below have everything you and your students need to create a great screencast.
If you decide to make screencasting a central focus of your classroom you should consider upgrading to a premium option to unlock advanced tools and features.
Here are the three best options that are currently available.
Screencastify
Screencastify is simple enough for someone just getting started with screencasting, with plenty of advanced features for more experienced users.
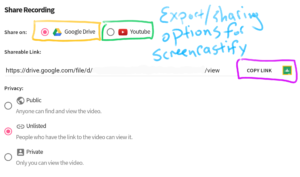
Screencastify is deeply integrated with Google. Your recordings are instantly saved into your Google Drive account and can be sent to Google Classroom with a single click!
Screencastify also offers a selection of annotation tools with the free version of their product. These tools are especially powerful if you have a touch screen Chromebook with a stylus.
Unfortunately, there are some pretty significant limitations to the free Screencastify account. You will be limited to 10 videos of up to 30 minutes in length. Your videos will have a Screencastify watermark on them and you won’t be able to export your videos as Mp4 files.
Screencastify Premium
If you find yourself creating a LOT of screencasts, upgrading to the premium version is worth the investment! The cost is $85 a year and removes the time and monthly video limits.
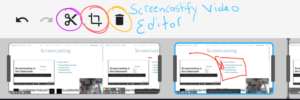
But that’s not all! Premium users also get access to the video editor (a simple but effective tool) export their videos as .mp4 or .GIF files.
The .GIF export is especially useful for creating short demonstrations that can be easily inserted into a Google Doc, slide presentation, or email.
Tip: For more on creating GIFs, connect with Jake Miller, the EDU GIF guy!
There aren’t very many web-based video editing options available, so the editor that is included with a premium Screencastify subscription fills a big void.
Granted, it’s not a fancy editor (no transitions, titles, etc), but honestly, a super simple editor is perfect in many situations. Here are some of the things you can do in the video editor:
- Trim and split a clip
- Crop a video (helpful when trying to focus on a small part of your screen
- Import a clip (great for combining live-action and screen video)
Screencastify Links and Resources:
- Install Screencastify
- Free eBook – 50 ways to use Screencastify in the Classroom
- Screencastify certification course with Matt Miller
ScreenPal (formerly Screencast-O-Matic)
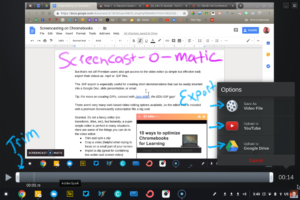
ScreenPal is a great option for creating quick videos. With ScreenPal, you can create and insert a video into ANY text field. It’s pretty slick!
ScreenPal is my personal recommendation as the best FREE screen recording tool available for Chromebook users.
ScreenPal offers a lot of nice bonus features with their free plan including the ability to add effects, annotate, and make simple edits.
ScreenPal videos are automatically uploaded to your ScreenPal account and can be exported to Drive, Youtube, or download a .webm file.
With a free ScreenPal account you can create unlimited videos that are 15 minutes or less. The free account only supports one audio source, so you will need to pick between the microphone and your computer audio.
ScreenPal offers a premium version which for $36/year. The premium version features unlimited video length, multiple audio sources, and an advanced video editor. Unfortunately, the video editor only works on a Windows or Mac computer. If you are a full time Chromebook user, the ScreenPal editor won’t be a good option.
Loom
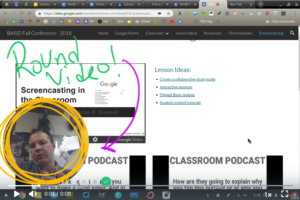
Loom is a new Chrome screen recorder that features round video and social sharing options.
Loom offers similar features to Screencastify and ScreenPal including annotation, simple editing, and video sharing.
A free Loom account has a 5 minute video time limit which might be restrictive for some teachers. You can save up to 25 videos in your Loom library before you will need to upgrade.
Social Screencasting with Loom
What Loom does well is turn screen recording on Chrome into a social experience.
Each video is accessed with a unique link on Loom’s website. The page features the video and an opportunity for viewers to comment on the video and react by selecting from several emoji symbols, similar to the Facebook like button.
Loom is an ideal choice if collaboration and conversation is the goal of your screencasting assignment.
Students can easily provide feedback and comments to one another, something that is not easy to do when using Screencastify, ScreenPal, or Screencast for Chromebooks.
If you are looking for something unique give Loom a try! I guarantee the round video will get people talking!
Resources:
Screencast for Chromebooks
If you are a Chromebook user (like me!), you have access to a really great tool called “Screencast.” This built-in tool is specifically designed to help teachers capture their lectures and record instructional videos for students.
What makes Screencast unique is the automated transcriptions that make it easy to edit AND watch a video. To edit, simply click the text you want to remove and you’re done! It’s amazing!
When watching a video, students can skim the transcript to jump to a specific point in the video. This is a great feature for more technical videos, like math instruction, where a student might want to review a specific problem multiple times.
Screencast is 100% free and pre-installed on all Chromebooks. The downside is that you must use a Chromebook to record your video and while it will work on other platforms, it is ideal if your viewers are using Chromebooks as well.
Check out this video overview of creating a video using Screencast for Chromebooks.
Video tips
Short is good!
Most viewers don’t want to watch an epic 15-minute screencast. Whenever possible, break longer videos into shorter segments. This also makes it easier to eliminate mistakes or re-record a video.
Plan your video
Spend a few minutes planning your screencast. Walk through the steps that you will explain to make sure you can navigate through the various pages and screens and direct attention to the important buttons, links, etc.
When you record a screencast pretend you are sitting across from someone teaching them a new tool. Be natural and conversational.
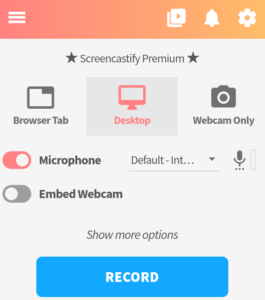
Tab vs. Desktop recording
When you begin a screencast on your Chromebook you will be asked if you want to record an individual tab or your entire desktop.
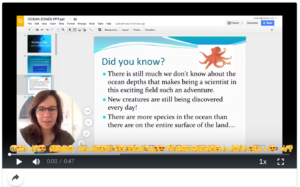
- Choose tab recording for simple screencasts, like narrating a Google slide presentation. When you choose tab recording, only one tab is recorded.
- Choose desktop recording for more complex recording that will move between multiple programs like Google Classroom, Drive, Gmail, etc.
Tip: If you aren’t sure which option you should use, pick desktop recording!
Add your Webcam
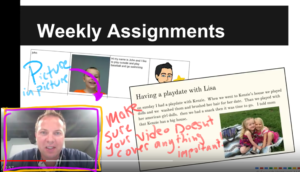
Some screencasting tools give you the option of recording video from your webcam at the same time as it records video from your screen. This “picture-in-picture” feature lets you connect with your viewers by allowing them to see your face while you present.
Tip: If you decide to use the picture-in-picture feature, make sure that your video doesn’t hide anything important on your screen!
Most screencasting tools also allow web-cam only recording. This is a great way to record first-person videos for sub plans or parent videos.
Annotate your screen
Some screencasting programs provide the ability to annotate (draw) on the screen during a recording. This is a great way to emphasize content on the screen and direct the attention of your viewers.
Tip: Annotation tools work best on a touch-screen device. Many touch-enabled Chromebooks are available and it’s worth investing in one with a stylus if you plan on doing a lot of screencasts.
I create my screencasting videos on a Pixelbook using Screencastify. I use the Pixelbook pen to add annotations to my images and videos. While not a cheap setup, it works extremely well!
Posting your Video
Once you create your recording, you need to decide where to post it. Google Drive and YouTube are the most common choices. Consider the purpose of your videos and student privacy policies to determine which option is best. Here are some things to consider:
- Google Drive – ideal for student recordings as it is easy to control who has access.
- YouTube – the best place to post recordings for public viewing.
- Google Classroom – while any video can be posted to classroom with a link, some tools support posting videos directly to Google Classroom.
- Self-hosting – a few tools offer to host videos on their own platform and can offer some unique features. You will need to investigate and consider these options to see if they are a good fit for your classroom.
Tip: The video sharing / exporting options will vary between different screencasting tools. Make sure the screencasting tool you select supports the sharing options you need.
Video Editing
Screen recording videos tend to have very little post-production (edits, transitions, background music, etc). Screencasts can be raw and unscripted. They let you connect to your audience (or students) as if you were there with them. Most videos are done in one take with minimal editing.
This is good news! You probably don’t have hours to edit videos or Steven Spielberg like vision for your short films.
If you are just getting started, don’t worry about editing. Keep your videos short and just act like you are talking to a student.
Once you are comfortable creating videos you may wish to do some simple editing. For my videos, I usually trim the beginning and end and sometimes will edit to clips together into one. If this is important to you, pay attention to the tools below that offer video editing.
Tip: Video editing is usually a premium feature. You can also import your screencasts into WeVideo, iMovie, or other video editing tools.
Pro Tip – invest in a microphone to double your screen recording quality
Your Chromebook has a webcam that includes a microphone. It works, but it won’t be great. Your webcam mic will pick up background noise, keyboard sounds, and mouse clicks.
If you are just getting started, don’t worry about it; your Chromebook webcam mic will work just fine.
If you plan on making more videos, especially if you want to publish them for the world to view, it would be a good idea to upgrade your microphone.
This doesn’t need to be an expensive investment. Even the hands-free headset that came with your iPhone will be an improvement.
Tip: I record using the Snowball Mic by Blue microphones. I also have a small travel mic from Samson. Both are affordable and work with Chromebooks.
If you plan on making screencasts with students on a regular basis I recommend that you check out ThinkWrite headphones. They are super durable and designed for classroom use.
What are you waiting for?
You made it the end of this long post.
What are you waiting for? It’s time to create your first screencast! Install one of the tools I reviewed above and get started!
Prediction: you will HATE your first video. Everyone does. We tend to be our harshest critics. Don’t give in to perfection.
To prove it to you. The video below is my very first screen recording from 2009.
Screencasting on a Chromebook is a powerful way to teach and to observe student learning. Check out my post on 20 ways to use screencasting in your classroom for more ideas!
Note: Some of the links above are affiliate links. If you choose to make a purchase I will make a small commission which allow me to continue producing content like this!

I tried all of this, they are either
blocked of wont let me get on it
You may need your IT admin to install them for you. It sounds like your district is blocking Chrome extensions.
I ;LOVE Y
I BEEN TRYING TO FIND THE PERFECT SCREEN RECORDER BUT NON OF THE WORK
i love it